A well-decorated sewing room for anyone who sews is possibly like a dream come true. A seamstress feels delighted while making interesting sewing projects for their loved one.
Sewing can be a hobby or an income source for a seamstress so deserve a room solely dedicated to crafting.
If stitching is your daily work, then you need a room where you can store everything in place.
A sewing room is not just a place to store sewing equipment, but also to sew in peace or to get inspiration for projects.
Well, let’s make your dream come true of having a well-prepared sewing room.
In this article, we’ll provide you with some basic ideas and some faces that you should remember while decorating your sewing room. Before that let’s look at some reasons briefly why you need an individual sewing room.
Aspects of not having an individual room
Well, if you are organized enough while sewing then the room can turn into a mess. You may not find the right thing at the right time which is quite disappointing.
Sewing includes a lot of little parts such as needles, pins, thread bobbins, scissors, and small pieces for upcoming projects. We often keep them in the corner or in the closet which turned into a chaotic area.
Sometimes, it becomes difficult to concentrate on your sewing project because you had to spend a lot of time rearranging them. Now, it’s high time to arrange a place where you can keep it all in one place.
You may search for ideas online or offline but remember that you need a room that supports your needs. If you are a beginner, then you need classic and straightforward decoration which is entirely different from a professional.
We’ve come up with some basic ideas for your dream sewing room so grab a cup of tea and read on more.
Common ideas and designs about the sewing room
Sewing is a creative pursuit but challenging as well when it comes to maintaining the tools and supplies. Don’t panic! We are here for you. Have a close look over the steps and let these ideas inspire you for having your own organized room.
Step 1:- Arrange a room or a large space
A spare room is perfect for turning into a sewing room. Or else, if you don’t have one then make sure to select a space that is large enough for a table and storage area.
Also, remember while deciding on a space that it has easy access to electrical outlets for your electrical equipment.
Step:-2 Decide what furniture and equipment you want to place
Once you decided on the space for your sewing room, make a draft plan about furniture and other equipment. If you can afford then buy new furniture like a table and a small cupboard.
Or else, you can use existing furniture. For example, use your old computer table as a sewing table and the drawers for storage. Additionally, you may need an ironing table, chair, couch, cutting or working table, full-length mirror, trash basket, and a little bit extra room.
Step 3:- Create a floor plan and arrange the furniture
Your idea for space and furniture is ready, now draw a draft plan. Assume a measurement of the entire space, furniture, storage area, and other areas you want to include.
If you have a spare room, then place the furniture accordingly. Like, put the working table in the center, the storage area in one corner, the ironing table on one side, and so on. Finally, arrange the furniture you want to use and place them according to your plan.
Step 4:- Add a wallpaper or wall color
You are all set with the planning now; so it’s time to paint the wall. Choose a wallpaper that inspires you or else the most refreshing color that may lift your mood while sewing.
Step 5:-Assembling the largest item
Your furniture’s all set to be organized. Keep all the largest equipment in a place where you can access them easily.
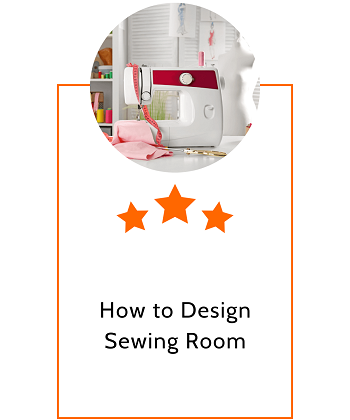
- Keep the sewing machine on the sewing table
- Arrange an ironing table caddies which can be hanging on the wall. It’s a great way to save space in the room.
- You can place the mirror on the back of the door.
- Store the fabrics of your current projects on the shelves or cubbies.
Step 6:- Decide the items you want to store
This item includes the tools that you don’t use frequently and want to store. You can keep a toolbox, boxes of small equipment, and other spare parts. Also, you can keep the fabrics and leftovers of the projects in a safe place.
Step 7:- Decide the items to keep in the open place
Keep all the equipment nearby you in an open place that you need frequently. Put a clear jar on the table or in hanging cubbies to store buttons, ribbons, extra threads, elastic, and hooks.
A soft cushion to keep the pins and needles. Also, use a pegboard to organize or hang tools and as a piece of art. Lastly, you can keep the sewing books or magazines in one corner of the table.
Step 8:- Add additional décor or soft furniture
When you are done with placing the equipment, then it is time to add extra. You can put a mild-colored curtain in the window and a soft cushion on the couch. Also, a vintage hanging light and a carpet with a comfort factor to providing a cozier look.
Step 9:- Showcase your work
You are all set to go now it’s time to showcase your job to get motivation. Collect an inspirational board that you can hang on the wall to display your projects.
The bottom line
Though turning a place into a beautiful sewing room can be a little stressful, trust me in the end you’ll get what you are looking for. You may not have an entire room for decoration, but it is not necessary at all. Everyone’s choice of furniture, decoration, and spaces is different so as their plans.
Our mentioned ideas are mostly applicable to all. So, the more organized you are while sewing, the easier it is to maintain your sewing room. Remember one thing; space is yours; so you are allowed to re-order the furniture and other equipment.