So, your machined feels worked up of late? Or you feel it’s not functioning as it used to do when it was new?
Well, it could be that you don’t perform proper maintenance rituals on it or you have neglected it altogether. Proper maintenance and repair of your machine can go a long way into keeping it at its best and even extend its lifespan.
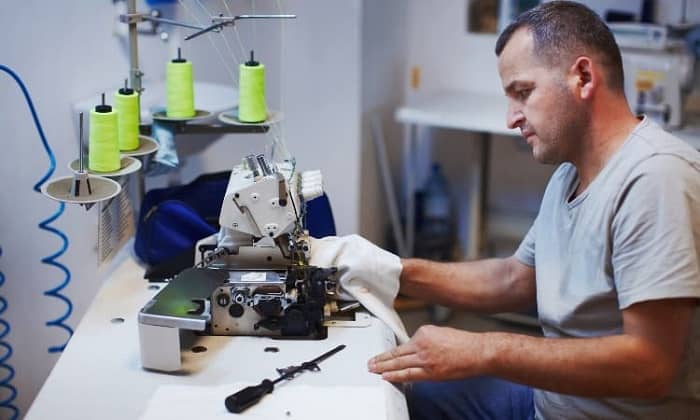
In this post, we’ll talk you through a basic maintenance and repair guide for your sewing machine.
This guide encompasses simple tasks that you can on your own at home, with simple tools, without the attention of a professional.
CLEAN YOUR MACHINE REGULARLY
One of the most essential habits all sewers should learn is proper, regular cleaning of their sewing machine. The frequency at which you do this should depend on how much you use your machine.
This is approx. 5 to 10 minutes practice that involves removing any dust bunnies, thread bits, lint, etc.—which can easily jam up your machine. Most machines come with an instructional manual showing you how to clean and care for them properly.
Unlike what most people think, however, using canned air to clean your machine isn’t a good idea. This is because it’ll end up adding moisture to your machine which can result in gunky lint that increases the possibility of your machine jamming.
OIL YOUR MACHINE
One thing you’ll have to agree with me is that your sewing machine comes with multiple moving parts. And proper lubrication of these parts will reduce friction and make your machine run smoothly and for longer.
The oiling part should always come right after you’ve cleaned your machine as well as the bobbin case.
You should also need to use good quality sewing oil, and not just any other sewing oil you come across (if you use the wrong oil, it’ll easily ruin your machine and projects).
Be sure to consult your manual to understand exactly where you need to put the oil.
Just a few drops of the oil is all you need to make your machine run smoothly, noiselessly, and for an extended period of time.
WIND THE BOBBINS CORRECTLY
Another practice that will play off when it comes to keeping your machine running at its best revolves around winding the bobbins correctly.
Make sure you use the bobbing recommended by your machine manufacturer and not just any generic bobbin.
Avoid winding over existing threads as this can result in tails which can then jam your machine. Using damaged or rusty bobbin can easily drag and effect the thread tension.
You should also try to keep off pre-wound bobbins as much as possible unless your machine manufacturer recommends them. The downside of such bobbins is that they tend to confuse low bobbin sensors easily.
USE A GOOD NEEDLE
Being the least expensive part of your sewing machine, you might think that a needle doesn’t require much attention. But the truth is that using the appropriate, good quality needle for your machines is crucial.
Using a quality needle isn’t enough, though.
You’ll also need to change it often—say after every 4 hours or when done with a project. This will help ensure you don’t use dull or bent needles which can lead to poor tension, skipped stitches, or damaged fabric.
And in some cases, a bad needle can cause serious damage to your machine.
USE GOOD THREAD TOO
Using cheap threads directly affects your stitch quality. Poor stitches also contribute to the tension headaches you might be experiencing with your machine.
Poor quality threads are notorious for leaving behind list and dust collections, which can then build up in your tension, thread guides, and bobbin case…not to forget the annoying inconsistent thread travels and stitches.
Majority of sewers have also reported that their machines run dry a few minutes after lubrication. The poor thread might also be the cause of this problem when it soaks up your machine lubrication.
When looking for quality threads for your projects, make sure you don’t use anything older than 5 years, especially for natural fiber threads. Such threads might be weakened and can easily break and leave thread bits in your machine mechanism.
Getting a quality thread is not all you need…
You should also focus on correctly threading your machine. This is also crucial for your machine, else you’ll have to deal with thread looping and improper tension.
On top of all this, make sure you use the correct foot when sewing (go through your user manual to familiarize yourself with different types of feet).
Foots are rarely interchangeable; using the wrong one can result in quite poor stitches.
KEEP YOUR MACHINE COVERED
I understand that you’ll not be using your machine throughout; sometimes you just want to take a break.
This means your machine will be idle…in which case you should keep it covered (most machines come with dust covers) to keep off dust as it can cause damage, especially for the electronic machines.
Make sure you store the machine in a dry place. If you keep in damp basements or other wet areas, moisture can cause havoc on its moving parts and cause rusting of the internal components.
Above all, make sure you switch off the machine and unplug it from the wall when not in use. Power surge, no matter how small, can cause dire effects which your insurance policy might not cover.
Final Verdict
These are the basic sewing machine maintenance and repair tips that every at home sewer should learn. All the machine problems we’ve covered above do not require you to have any level of professionalism to handle them.
After reading this guide, we encourage you to skim through your user manual to get more details specific to your machine on how to take good care of it.
Remember that regular maintenance of your machine will enable it to run smoothly and even increase its lifespan.