The bobbin is a small spool of thread that is one of the most important parts of the sewing machine. To complete any sewing project, you can never ignore the stitches coming from the bobbin.
It provides the thread from the backside that locks the stitches from the other side of the fabrics. Before that, you need to thread a bobbin and set the bobbin case in the machine.
But, here a lot of people face problems while threading a bobbin. It is frustrating at a time if you don’t know how to thread the bobbin. Also, how to set the bobbin case in the sewing machine.
Though it is not a difficult task if you take the thread through the essential thread guide, the thread would be evenly looped if you take tension controls. Having the smooth and evenly looped bobbin will assist you to have a proper finish.
An incorrect setup of the bobbin may create tangles in the thread. So it is most important to know the whole set-up of a bobbin in a sewing machine if you are a beginner here and about to start a new sewing project.
Then it is very important to know some basics about the bobbin and how to thread it evenly. After that, we will provide you with all the necessary steps to set up the sewing machine bobbin. Let’s get started!
Basics about Bobbin
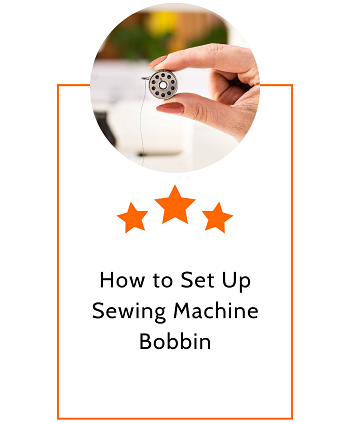
The other name of the bobbin is the spool holder. The bobbin is a cylindrical-shaped small spindle that feeds the thread for the backside of the stitch. No sewing machine can work without one.
Bobbin has multiple functions such as; holding the spool thread and controlling the direction of the thread while going through the machine. It supplies the bottom thread of the stitches.
It usually stays under the pressure foot when the threaded needle from the upper part goes through the pressure foot. The thread from the needle gets attached to the bobbin thread and picks it up.
When we place the fabric in between them, it repeatedly threads the fabric. The upper thread and bobbin thread connects in a way that locks the stitch from both sides.
Once the thread is finished, then you need to thread the spool holder. Let’s briefly see the necessary steps to be taken while threading a bobbin.
The Steps to Thread a Bobbin
Knowing the correct method of threading a bobbing may open up a world of creative possibilities. You may find them intimidating, but once you get a general idea, then it will be a fun task for you.
Most sewing machine usually looks the same such as the tension disc is over on the left side and the bobbin winder on the right of the machine. Besides the tension disc, you will find a take-up lever and tension wheel with a spool pin. Now follow the mentioned steps:
- Step 1: Set the spool in the spool pin and cover it with a spool cap. A spool cap is provided with the machine.
- Step 2: Take about 18” of thread from the spool and bring it around the tension disc. Then wind it once and take the corner side in hand.
- Step 3: Select a bobbin that works perfectly with the machine and slides it onto the bobbin winder.
- Step 4: Wrap the thread around the bobbin while having a small tail on the end.
- Step 5: The bobbin pin may touch the bobbin winder. Now it is all set to fill the thread.
- Step 6: Then slowly press the foot pedal until the bobbin winder is filled. Fill the bobbin with the amount of thread that you’ll need for your project. Make sure to fill the bobbin evenly otherwise, it may be engraved.
- Step 7: Once it is filled then slide the bobbin pin back over to the left.
If there is no hole in the bobbin, then place it on the last spot of the bobbin winding area. Then wind the bobbin with the thread a few times. Hold the thread tail and start winding. You can trim the thread once the bobbin starts to fill.
That’s all about threading the bobbin now coming to set the bobbin machine. Once your bobbin is evenly filled, then it is ready to set in the machine.
Setup of Bobbin in Sewing Machine
Before starting the set-up, make sure to turn off the machine otherwise you could be injured. Let’s have a look at the steps:
- Step 1: Rotate the handwheel and raise the needle.
- Step 2: Open the shuttle by hand or remove the bobbin cover by pushing the button on the right.
- Step 3: Remove the bobbin case and insert the threaded bobbin. Make sure to place it counterclockwise when you pull the thread.
- Step 4: Bring the thread through the small notch on the bobbin case.
- Step 5: Placing a finger gently on the top of the bobbin, pull the thread toward the right side. Pull until it snaps through the slanted guide and takes about 6″ of the thread.
- Step 6: Then flip the casing and let the rest of the thread toward the right side of the horn.
- Step 7: Place the bobbin case into the bobbin housing so the tip of the horn assembly with the notch in the shuttle hook is over. Push the bobbin inside until you hear a sound that ensures that the bobbin snaps in place.
- Step 8: Now replace the bobbin cover with the needle plate.
All machines are different in their way, but the process is common for everyone. The above-mentioned steps are some common steps that can be used for any machine.
Final word
In the above discussion, we tried to provide every single detail and step about the setup of the sewing machine bobbin. Take all the necessary precautions and steps before the start. Such as; the thread should not exceed the bobbin, never using a rusty bobbin, ordering extra bobbin, and so on.
We believe that you learned about the whole setup of the sewing machine bobbin. Now you may start your project safe and sound. So, dust it off, plug it in, and start practicing!