Many beginners in sewing still might not know many aspects of a sewing machine.
No wonder, because there is so much to learn from a sewing machine. And when it comes to a quilting machine, the syllabus increases quite a bit, if not a lot.
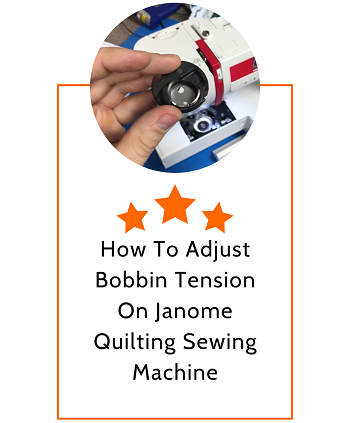
One of the most common things about a sewing machine a beginner might not know is that the bobbin case has its own tensioner.
You need to tighten or loosen it, bit by bit, depending on the stitches formed on the fabric. Take a Janome sewing machine for quilting, for example. It makes some of the nicest quilts with even precise stitches.
Bobbin Case Tension Adjustment
Many people miss out on the bobbin case tension adjustment because it comes well set already. With periods of using the machine and sewing layers upon layers for days, the tension might tighten or loosen.
However, unless you have the correct tension set on its bobbin case, the stitches will not be as good as they need to be. It will be uneven, tight from the underside, and will jam and gather on the quilt and ruin it.
To avoid all this, one needs to understand that if the stitches are uneven, it’s not always the thread tension or needle. It could very well be the bobbin case tension. So, how will you know whether it’s the thread, needle, or bobbin case? And if it is the bobbin of the Janome quilting machine, how to adjust it, let’s find out.
Step #1 – Know The Basic
Let’s get into the basics a little and explain how the bobbin and its case operate. You have your bobbin case; there will be a slit and a grove kind of thing over the bobbin, known as the finger. The bobbin case takes the full bobbin winded up with thread, and you need to insert it in the shuttle.
So, hold your bobbin case and insert the bobbin. Now pull the thread slowly, and it will unwind clockwise, which means the bobbin will rotate clockwise. Now take the pulled thread through the slit and then through the finger.
Just beneath that slit and at the furthest side of the finger, you will notice a tiny screw. It is in the center of the spring tension. That screw is what you need to loosen and tighten up for tension adjustment.
Step #2 – Check Whether It is Actually The Bobbin Or Not
To check whether the tension issue is with the bobbin case, hold the pulled-out thread with two fingers of yours and check the resistance. Notice how smoothly the thread is getting unwind. If it’s too slow, the tension is too tight.
And if it’s pulling out at once in no time, it is loose and needs tightening. The thread pulling out should be not too slow nor too fast, just the right pace and resistance, and when you will do the checking, you will allude to it and understand.
Step #3 – Make The Much Needed Adjustment
Now when you know the tension needs tightening or loosening, just take your screw and work accordingly. If you feel the tension is not right, and needs a slight tightening because the pace of the bobbin falling on your hand is slow and unsmooth, turn the screw on the spring tension, a quarter only, anti-clockwise.
Similarly, if you feel the bobbin falling on your hand is uncontrollably fast, there is zero resistance; of course, you need to tighten it. So, take the screw, tighten it a quarter, clockwise, and it will be well-tightened.
Now recheck the tension by holding the bobbin case with the thread and its resistance. And depending on how loose or tight it is, even now, turn the tension screw, bit by bit. Turn it just by a quarter every time.
Quite apparently, the whole bobbin case tensioner and adjustment of it is a piece of cake. But of course, when you know how to do it the right way. As now you know, the uneven, gathered stitches could be caused by your bobbin tension; adjust it following the steps we shared and solve the issue in no time.