At times, it happens that the machines which we use in our daily work get out of order, disturbing the whole work.
As we know that it is not possible that there would be a problem with the whole machine. It would in some of its parts which get out of order and stop working properly. So what to do in such conditions?
Is it easy to buy a whole new machine? It is hard to replace your machine which you are used to working with.
So to overcome the problem, it is suitable to just replace the disordered part instead of replacing your machine with the new one.
The sewing machine is one of the most widely used machines across the world and in almost every house, it is used for sewing purposes. Different sewing machines are used for different types of clothes but at times when we force the machine to work on hard materials like denim or leather, it gets out of order because of excessive burden.
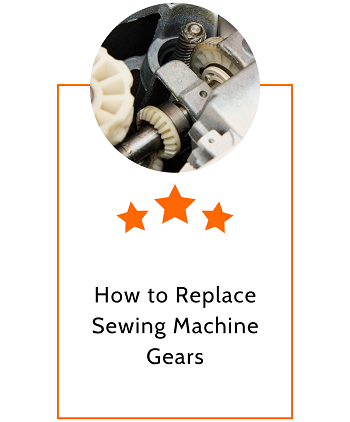
The most commonly affected parts are the gears that work to move the needle and feed teeth. As a result of this process, the fabric placed under the foot moves forward. If the gears stop working properly, the whole sewing process gets disturbed as your machine does not work in order.
In such a situation, the best option is to replace the old gears with new ones instead of replacing the whole machine. Sometimes, you are emotionally attached to your sewing machines because of their acquaintance with your dear ones, your mother, or your grandmother, so it is extremely hard to lose them.
Ultimately, you are left with the option of replacing the defective part with the working one.
Steps for replacing sewing machine gears:
To accomplish any task, you, surely have to follow certain steps. So to replace the defective gears with the new ones, you have to lift the sewing foot with the help of the sewing wheel. You need to take the foot off which is fastened with the help of screws.
Just loosen up the screws and remove the foot. Next, you have to remove the needle plate and bobbin. If you remove the whole bobbin case then it would be much better but it is not necessary. You can do it otherwise.
Putting the Machine Upside Down:
As you are done with the above-mentioned steps, what next you have to do is, to put the machine upside down. Usually, gears are fixed on the bottom side of the machine but it is not necessary.
You might have a machine in which the whole system is fixed on the upper side as it depends upon the type or company of machine you are using. There is no hard and fast rule for this. So in machines, which have their machinery in the bottom case, you need to disassemble the bottom part of the machine
Disassembling the Machine:
Here, the most important point is that, whenever you are going to disassemble anything, especially a machine, you need to have appropriate tools for that. If you try to loosen up the screws with the wrong tools and try hard on them, you would surely lose your machine.
Loosening the Screws:
The next step for replacing the gears is to take off the bottom cover by just loosening the screws. Another important point is that you need to keep all the screws with their respective parts so that when you try to assemble them, you don’t face any problems.
Locating the Main Shaft:
As you are done with taking off the bottom cover, the next step is to locate the main shaft on which the gears are fixed. Loosen up the shaft by removing the screws fastened to it. You can do this with the help of a screwdriver or an Allen wrench, depending on the type of machine you are operating.
You might have different types of machines or they might be manufactured by different companies, so what is important is that you need to locate the particular parts which I have mentioned in this article and work on them. Don’t get confused with the position of those parts!
Freeing the Gear:
Moving to the next step, you need to move the shaft right up to a distance until the gear attached to it gets free. There might be a small clip attached to the shaft, so you need to remove that clip before moving it otherwise it won’t move. Again, it is a reminder to keep all the disassembled parts safe because it would be problematic if you lose any part of them.
Replacing Old Gear with New Ones:
Loosen up the screws of the gear and replace the gear with the new one. The number of gears fixed in the machine depends upon the type of machine you are using but here is a piece of advice even if only one gear is defective, you should replace all the gears for the sake of better working of the machine.
Reassembling:
As you are done with replacing all the old gears with the new ones, the next step is to be to reassemble the parts. Put all the parts back in their positions and fasten them with their respective screws. Don’t place them in the wrong positions!
Checking the Replaced Gears:
Next, you need to check whether the replaced gears are working well or not. If your machine is not working properly, then it doesn’t only mean that the problem is with the gears. The problem can be with the other parts which you disassembled before and haven’t fixed them properly. So it is very important to fix all the parts back in their appropriate positions, otherwise, it would be much more problematic.
Final Conclusion
Once you are done with proper reassembling, then check the efficiency of replaced gears. In the beginning, you might find it problematic but it would be fine after a few days of working.
It is because you have placed new parts in a machine that might be working for many years and has other parts much older and used. So the new gears find more time to get adjusted and correlate with the older parts.
These are the steps to replace the gears of the sewing machine. Apart from the slight differences in the machines regarding their type or company, these are the main steps that must be followed to accomplish your task.