A blind hem is precisely what it sounds like a hem with stitches you can hardly see.
It’s excellent for window coverings, the hem at the bottom of a garment, or anywhere you want a clean finished edge.
When I first began sewing, attaining an exact blind hem was like discovering something interesting.
And then a funny thing happened, I practiced it a few times and understood it was really easy.
It’s sort of like understanding how to use chopsticks – at first, it seems so uncomfortable and challenging.
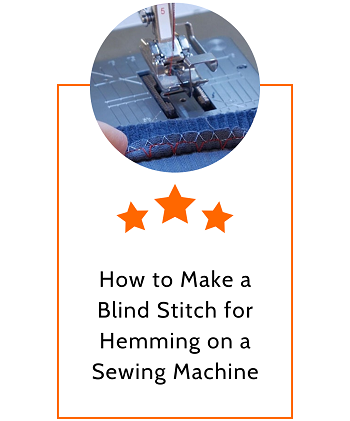
Try a blind hem, and you’ll never decline a wad of sticky rice in your lap again. This is a unique foot that comes primarily with most sewing machines.
The foot indicated below is the 9mm Blind Hem foot that came with the Janome Skyline S7 machine. Your presser foot edition might be slightly different depending on the brand and/or model of your sewing machine.
Now, you will know how to make a blind stitch for hemming on a sewing machine.
A Complete Guide for Making a Blind Stitch for Hemming on a Sewing Machine
A blind stitch hem is simply a hem where the stitches are not indicated on the utmost of the garment.
The invisibility is improved by using a matching thread and establishing minute vertical stitches that blend into the fabric. It is very successful in patterned fabrics that are light to medium weight.
Tools:
- Blind hem presser foot.
- A sewing machine that can sew a blind hemstitch.
- A magnifying lamp (optional, but super helpful)
- Iron for pressing.
Materials:
- Marking pen, pencil, or chalk.
- Ruler.
- Pins.
- Iron.
- Blind hem presser foot.
- Steps of making a blind stitch for hemming
Steps of making a blind stitch for hemming
Here are some steps to make a blind stitch for hemming.
STEP 1 – PRESS THE EDGE
If you utilize a lightweight fabric, press the raw edge up by ¼ inch (6mm).
Alternatively, if your fabric is certainly bulky, you can sew completely with a serger or zig-zag the edge. If you use your serger, just be careful to cut the minimum quantity from the raw edge.
STEP 2: PRESS AGAIN
Press the edge up again by the seam budget.
Here I am giving rise to a 1-inch (2.5cm) wide hem. Place pins along the hem vertically to the edge as shown.
STEP 3: FOLD BACKWARDS
Fold the hem under the ends so about ⅛ inch (3mm) pushes out of the edge.
STEP 4 – SELECT STITCHES
Make sure your machine is threaded with a matching string for the best outcomes.
Now prepare your machine on the blind stitch setting. You will expect a width of 2-3 and a length of 2-3.
This is what the stitches usually look like. There will be some differences between machine brands, and not all machines will have a stretch fabric blind hem choice.
STEP 5 – STITCH
Most machines will come with a different foot for blind hemming. If your machine doesn’t have one, don’t worry – you will just have to concentrate a tiny harder to sew straight.
Roll the fabric underneath your machine so that the zig-zag part of the stitch just pieces through the folded top edge of the material.
If you have a blind stitch foot, the cue will be aligned with the folded edge. Keep it aligned as you sew. Make sure you don’t sew over your pins.
STEP 6 – FOLD DOWN
Fold the hem down. The stitches will pull vertically, very narrowly.
Frequently Asked Questions
- What is called blind stitch?
A blind stitch in sewing is a technique of joining two pieces of fabric so that the stitching thread is unnoticed or nearly hidden. Blind stitching hides stitching under folded edges; thus, this kind of stitch can build a blind hem or join two folded edges jointly.
- When to use a blind stitch hem?
It is generously suited to straight hems like those found on a skirt or pant legs.
A blind hem should be used where you expect a wider hem with a hidden finish on the right side of the garment.
If you have a round hem or are using thick fabric, it would be best to use bias tape to complete your hem rather than a blind stitch hem.
Conclusion
Remember, you can accomplish this if you don’t have the blind hem stitch foot. But you will need that specific stitch on your sewing machine, as I showed above.
Exercise a few times by folding your fabric just like I did above. And then feed your fabric underneath your basic presser foot.
Adjust as necessary and keep it straight and steady. I hope it will help you to learn how to make a blind stitch for hemming on a sewing machine. Take care.