Many high-end sewing brands like Janome, Bernina, and Singer include multiple needle positions in their products.
Also, most devices with zigzag capabilities have this incredible feature. There are mainly three main positions, but some units have even more.
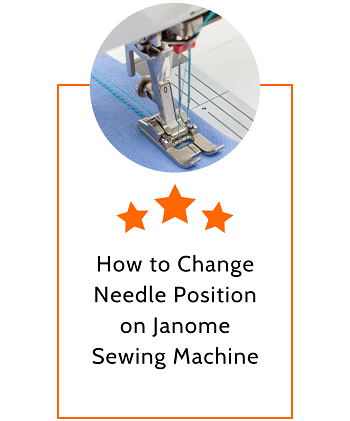
This article mentioned the right way to adjust needle placements on Janome Sewing Machines for Beginners. Before that, let’s take a look at its benefits.
Why are different needle positions necessary?
This option enables us to use guides on a presser foot and achieve stitches exactly where we want. We can maintain a gap from the seams as per our needs while running the machine.
A few presser feet even fail to work without moving the needle. For example, Whenever a sewist uses a zipper foot, she must shift the needle to the right or left. Otherwise, it can break or bend.
It is also helpful for asymmetrical stitches and narrow decorative stitches. We can reposition the needle to achieve the precise distance between rows easily. There is no need to touch the fabric at all.
You can’t understand these benefits unless you try them yourself. Feel free to experiment with all the modes. It will help you to understand what big changes several positions create.
How to adjust the position?
You can do it on any stitch if you are not using the maximum width for your fabric. Basically, you have to shift the needle from the center, depending on your demand.
Choose a suitable needle and thread based on the garment you are working with. Thin needles are for thin pieces, while thick ones work great on thick layers. Wind bobbin and thread your machine correctly. Align the presser foot in the right place. Raise your presser feet, place the cloth, and lower the needle on it. Then, follows these instructions:
- Adjust the zigzag width to get the perfect stitching line. Find out the zigzag button of your device. The width-changing option will be on after pressing the mode selection key.
- If the ‘3.5’ appears on the LED, it means that the needle is in the middle position right now. It is only valid for 7-millimeter machines. If you own a 9-millimeter model, the center will be at ‘4.5’. Similarly, ‘2.5’ is the center of the old 5-millimeter devices.
- Press (+) or (-) part of the stitch selection key for moving the needle to the right and left, respectively. The value appearing on the screen will change at the same time. It decreases when the needle goes left and increases when it goes right. As you can assume, ‘0’ indicates the leftmost position and the highest number represents the rightmost position.
- You will see how the needle is moving on the screen. Now, have a look at your real needle. If it is up, it starts going sideward instantly. Sometimes, people don’t see the visible change because they keep the needle down. So, don’t be confused about it. As soon as it goes up, it moves to the selected needle position.
- Some Janome models provide 100 needle positions. Stop when the needle arrives at your target place. Now you can turn on the straight stitch switch. You can switch the position again and again to change the seam distance. A quick way to bring the needle back to the center is to select another stitch; no need to press the (+) or (-) keys.
- Be sure to stitch straight after changing the needle’s position. Pay attention to the guide and foot instead of your needle.
- Practice making designs on scrap pieces to get more familiar with the settings. You can start working on the main project right after adopting this skill. If you combine an excellent presser foot with the proper needle position, the stitches will be outstanding.
We hope that this guide removes your confusion about variable needle positions. If your old machine has a fixed needle position, you should invest in modern Janome models. We guarantee that you will love the outcome. Happy sewing.
I have not used my janome horizon machine for at least two years. when last used I was using the even feed foot. I have disconnected that and attached the normal straight stitch foot but my needle is hitting the base plate. normal left or right adjustments don’t work as it needs to move bacl slightly and I don’t know how to do it. please can you help?