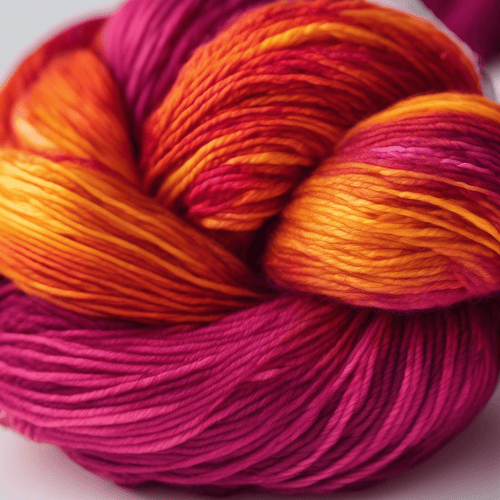
Imagine being able to dye your own yarns at the comfort of your home?
This is a truly essential skill for every serious crocheter and knitter out there as it saves you the hassle of hopping from one to shop to another in search of a perfect shade for your project.
In today’s post, we want to teach you everything you need to know about dying yarns at home, including the most effective yarn dying techniques.
Let’s start with the BASICS:
WHAT KINDS OF YARN SHOULD YOU DYE?
You can dye just any kind of yarn—right from the chunky to the super bulky yarn, from merino wool to any cheap yarn you can find out there. The yarn weight is simply a non-issue when it comes to dying.
The only thing you should focus on is what the yarn is made of as this will help you determine the types of dye to use.
TIP 1: In most cases, we suggest that you start with the animal fibers—like wool, alpaca, mohair, etc.—as they tend to hold the dye better.
Tip 2: If you’re dying for the first time, we also suggest that you look for a cheap yarn for practice purposes only. Later on, when you’ve learned to dye, you can look for something more expensive.
While still on it, the project you’re planning to work on should spell out the weight and yardage of yarn to use.
WHAT TYPE OF YARN DYES SHOULD YOU USE?
The type of dye to use will heavily depend on the fiber content of the yarn you plan to dye. This is based on the fact that different dyes work best with different materials.
For yarns made up of the animal protein fibers, you’ll need to use an acid dye.
If you don’t know the content of the yarn you want to dye, you can use the RIT, a composite dye that contains a mixture of different dye types for various fibers. However, you might not obtain bright, strong colors with this dye as you’d with the fiber-specific dye.
You might also have heard about food coloring being used to dye yarn. Whether it’s just the plain flood color, Easter egg dyes or the Kool-Aid—they all work miracles when it comes to dyeing yarn.
The best part about using food colors is that they’re pretty cheap and easier to find. You also don’t need to use any special pots and pans to use them. For these reasons, we believe that they’re the best option for anyone learning to dye yarns.
WHAT SHOULD YOU WEAR WHEN DYING YARN?
While there’s no set uniform for carrying out the yarn dying job, it’s no-brainer that you’ll need to put on some gloves, a face mask, and even an apron or an old t-shirt. These are crucial as they’ll help prevent you from getting messed up during the entire process.
WHAT OTHER SUPPLIES DO YOU NEED FOR THE JOB?
Apart from the yarn to be dyed and the dye itself, you’ll also need a number of additional supplies for successful dyeing.
These supplies include:
- Old pots, pans, dishes, etc.
- Plastic cups and spoons (for mixing the dye powder)
- White vinegar (for the acid dyes)
- Heat source (this can be a stove or hot plate)
- Plastic wrap
- Chopsticks (to help you gently move the yarn around when dipped the dye)
- Squirt bottles
WARNING: The utensils you use for dying shouldn’t be used for cooking again unless you’re dealing with edible dyes like the Kool-Aid or food coloring.
Now that you know the basics of yarn dying, let’s get into the business of dying your yarns at home…
TOP YARN DYING TECHNIQUES:
1. THE KETTLE METHOD
This method involves dying and heat setting your yarn set in a single container. This makes it a much quicker process than hand painting (discussed below) where you first paint the dye on your yarn and then heat set it.
The only downside of kettle dying is that you don’t have much control over where the dyes end up. This is because they tend to run together and blend more than in the cases of hand painting.
HOW TO KETTLE DYE YOUR YARN:
1. Start by dissolving your dye separately in a small container with water. Then add your yarn plus the dissolved dye in a kettle.
2. Next, add enough water that will completely cover the skein. Don’t worry about adding too much water as this will not affect the yarn color in any way (the color depends on the amount of dye used).
3. Turn on your stove top and heat the water until it’s about to boil. Cover the pot and turn the heat off.
4. Allow your yarn to sit for about half an hour. You might consider stirring for a few minutes as you check the color.
5. When half an hour is over, gently rinse your “new” yarn in warm water. DON’T use cold water for rinsing and don’t agitate the yarn too much to prevent potential felting.
2. HAND PAINTING YARN
Different people recommend different ways of hand painting your yarn. Some prefer applying the dye using brushes or cups.
But we recommend you to use squirt bottles as they give you more control over the amount of dye you apply.
HERE’S HOW TO HAND PAINT YOUR YARN:
1. Start by soaking the yarn in warm water with vinegar for around an hour. As the yarn is soaking, mix up the dyes to be used (be sure to follow the instructions on the dye bottle).
2. After an hour is over, remove the yarn from water and leave it to drain for about 20 minutes. Consider squeezing the excess water as well.
3. Now place the yarn on a plastic wrap. Use a plastic that’s larger than your yarn area.
4. Assuming you’ve already put your dye in squirt bottles, start applying the dye on your yarn. Use chopsticks to help move the yarn for even dye application.
When switching to a new dye color, consider leaving a small gap to allow different colors to easily blend together.
5. After you’re done applying the dye, you can use newspapers to help soak up any excess dye.
6. Roll up the yarn in the plastic wrap and place it in a large pot with steamer basket or anything that’ll help keep off the water. Add water to the pot and bring it to boil, then simmer for around 1hr. allow the yarn to cool overnight.
7. Finally, rinse the yarn gently in lukewarm water until your water turns clear. Place the yarn filled with water and dish soap solution to help remove any dye particles that didn’t stick properly.
3. USING A SLOW COOKER
Dyeing your yarn in a slow cooker or crockpot is another effective heat setting dyeing technique for yarns.
This is a great method if you want to dye only a small amount of yarn (say 1-2 skeins), or you don’t have sufficient room to make mess, or just don’t want to stink up your house by using the oven.
To dye your yarn in a slow cooker, you’ll just need to follow the same steps as in kettle method…only that you’ll be using a slow cooker instead of stovetop for the heating process.
However, this method might require some experimenting with temperature as some cooker tend to get hotter than the others.
Final Verdict
Nothing is more satisfying than turning your pure white yarns into the magical colors of your choice.
Learning how to dye your own yarns enables you to easily make the right shades you need to use for your projects. And this helps you escape the daunting task of going from shop to shop hunting for a certain yarn color without luck.
We hope that our detailed yarn dying guide above will equip you with all the info you need to start dyeing your own yarns at the comfort of your home.