When your sewing machine doesn’t work correctly, then it becomes very much frustrating. To get a smooth and break-free performance, you should clean and oil your machine.
Whatever the brand of your sewing machine, it requires regular maintenance.
Proper maintenance helps the machine perform better than before and enhances the shelf life of all kinds of machines. It also prevents any sewing machine issues as well. You need to keep all the parts well-lubricated to get a consistent performance.
This article is dedicated to all the sewists who face difficulties while sewing. When was the last time you lubricate your sewing machine? Don’t worry! It is time to do this job.
Before knowing how to oil your sewing machine; we’ll briefly discuss lubricating your machine and how often you need to oil it.
How Often Do You Need To Oil Your Sewing Machine?
How often you need to oil depends on how much you use the machine and the type of fabrics you use. If you are a regular user and use fabric like velvet, then you need to clean and oil the machine frequently. Or else, if you are a moderate user then you can clean your machine once every few months.
Types of sewing machine oil and their use
Basically, sewing machine oil includes a common lubricant such as petroleum, but there are lots of natural and artificial alternatives. Coconut oil is one of the most common natural machine oil.
You’ll get two types of machine oil- Mineral oil and Synthetic oil. Both of them are equally effective, but still, they differ in some ways.
Mineral oil is primarily a petroleum-based substance that is less expensive. It doesn’t have any harmful effects in general except a small oil stain on your clothes. Mineral oil can be used in any machine.
Synthetic oil lubricates both the steel parts and the plastic part of your sewing machine. It protects the machine from oxidation and also polishes the plastic parts to prevent thread breakage. Synthetic oil is more expensive than mineral oil.
Well, we hope you are quite clear about different types of oil. Now choose the proper oil that is suitable for your machine. You are ready to go for oiling your sewing machine.
Learn how to oil your sewing machine
Before starting the oiling process, let us inform you that it requires some additional equipment like clean clothes, a brush, compressed air can, and of course the oil. For your convenience, we are showing the ways of oiling in several steps.
Step 1:- Prepare the machine and read the instructions
The very first job is unplugging your sewing machine. Check the instruction manual because every brand is different. Follow the instruction to remove the part for preparing the machine for oiling.
Some machine includes a screwdriver, so you can use it to unscrew the parts. Few instruction manuals include the process of oiling for ease of use. Prepare the machine to remove the throat plate which gathers most of the dust and fabrics.
Step 2:- Clean the machine
It is mandatory to clean all the parts before oiling. Disassemble all the small parts and remove all the extra things that will get in the way while oiling. Take a nylon brush or paintbrush to brush away all the dust in between all the nooks and crannies.
Remove the bobbin case and clean it thoroughly. Also, make sure to clear in-between the feed dogs with the end of a screwdriver. Once the small parts are adequately cleaned, then take a clean cloth to clear the other large parts.
Step 3:- Use a compressed air can
Parts that could not be cleaned by the brush, can clean them using a can of compressed air. As it is impossible to reach into the deeper so you may use a nozzle.
The compressed air will force the pieces of lint to get away which could harm your sewing machine. It is necessary to clean the internal parts because only then the oil will reach there.
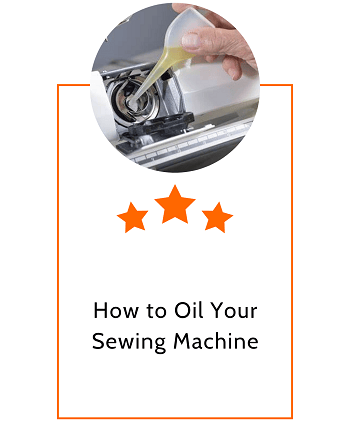
Step 4:- Lubricating and oil your machine
Once your machine is properly cleared, then it’s time to oil your machine. The manufacturer provides a bottle of oil with the machine.
If it gets finished, then you can use car oil, and coconut oil, or buy a new one. The way of oiling may differ because of the nature of oils.
- Put a few drops of oil into the hook race to oil the shuttle hook.
- Squeeze a few drops of oil into the housing unit where the bobbin case sits in and in the needle.
- Then put a few drops into the silver ring where the bobbin hook fits. Also, in the outer ring of the bobbin hook.
- Finally, spread some oil into the moving parts and check whether friction is formed or not.
Step 5:- Wipe away the excess oil
When you are done with the oiling process, then it’s time to clean the excessive oil. Excessive oil can ruin your next project. Take a piece of soft fabric that may absorb additional oil.
- Leave a piece of clothes under the presser foot that could soak up the excess oil.
- Use a soapy towel to wipe the body of the machine then clear the leftover with a clean fabric.
- Use a piece of paper to clear the tension disk.
- Wipe out the bobbin case and needle pin.
Step 6:- Re-install the parts
Now the overall oiling process is done, it’s time to re-install the machine parts. Simply, install back the throat plate, bobbin case, needle, and all other parts. Then plug your machine back and try few test seams before starting your next projects.
Some Additional Tips
- While disassembling the machine, extract only a few parts to make the process easier and also to prevent the chances of losing.
- If you find any difficulties, then follow the instruction manual.
- To get consistency in the performance, clean and oil the sewing machine frequently.
- The best thing you could do is after every use covers the machine to prevent dust build-up.
Final verdicts
Though the sewing machine oil includes a variety of natural ingredients, the process of cleaning depends on the machine’s lifetime and design. Take it as a fun task instead of getting intimidated.